Building a full-stack web-app in Kotlin

We’re talking micro-service style API, and browser side scripting in Kotlin (Kotlin2JS)
Since Kotlin is now an officially supported language for Android, it only stands to reason that people will start to adopt Kotlin faster than Angelina Jolie can adopt children from Africa. Most of us are aware of the fact that we can just drop in Kotlin in to any Java/J2EE project in a rather frictionless manner. However, as was made clear at the Google I/O session on Kotlin, Kotlin can be interpret down to JavaScript and Objective-C as well. This means, you can have an API, web-app, Android app, iOS app and use nothing but Kotlin to get there. For someone wanting to learn Kotlin, what more exciting opportunity can there be!
This is trial by 🔥!
Not a fan of trial by fire? Fear not young Padawan, The Doctor is in to help you live long and prosper through the journey, and make sure that whatever happens, you don’t cross the streams 👻 (Have I offended all the geeks yet? 🤓)
There is a lot to cover here, so as I mentioned in the intro, we will only be covering building API’s and browser-side scripting using Kotlin. There is a lot written/recorded on building apps in Android using Kotlin so I don’t feel the need to beat the dead donkey on building Android apps in Kotlin.
Setting up your project
At the outset, I would like to point out that I’m going to keep this dead simple. As such, my project structure may be slightly different from the Kotlin examples that you may find out floating around on the internet. First, we set a few expectations:
- We’ll be using Gradle to build our project.
- You can’t use the kotlin plugin and the kotlin2js plugin in the same module so we will create a “full-stack” project and add a “backend” and “frontend” module to this. the advantage of this approach is that you can put all your common code in the “full-stack” project, though, this is not the way most example online structure their code.
- We’re setting up micro-service style API. So expect it to be self contained, minimalistic. In this instance, Kotlin has a project called ktor that provides integration with Netty and Jetty as an embedded server. We’ll be using ktor with Netty, keep in mind that ktor uses coroutines and may not be production ready.
- Please don’t expect this code to be optimised and production ready. It’s just serves as an example for what is possible with Kotlin.
- I’m not going to use webpack-dev server or anything of the sort to monitor changes to files, so you’ll have to build manually after every change. This will get your used to whats happening, you can automate as you see fit after this.
- I will be using IntelliJ IDEA CE.
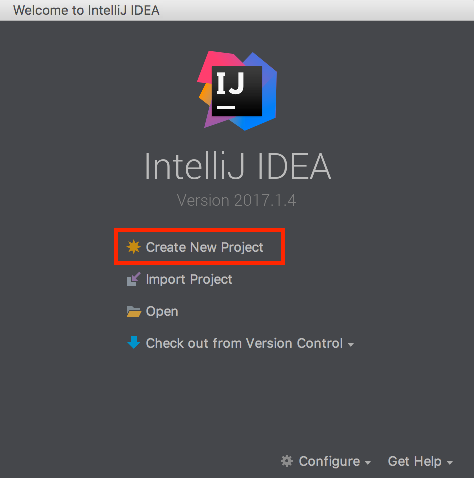
Start by launching IntelliJ IDEA > Create new Project
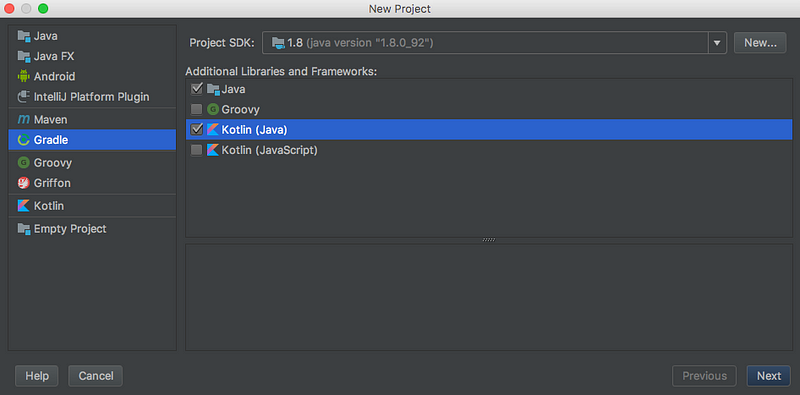
Setup your Kotlin full-stack project as shown below. We are going to be using Gradle to select that on the left hand side and on the right hand side add support for Java and Kotlin (Java). The purpose of the full-stack project is to house the common code if we have any, so JavaScript support is not needed.
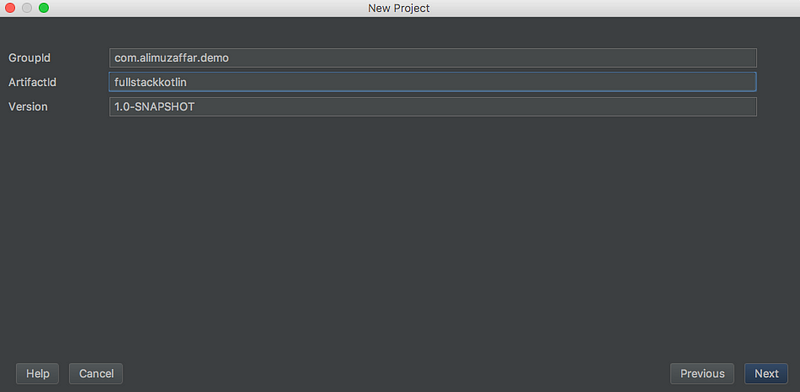
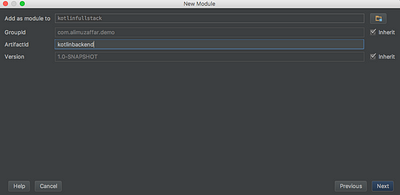
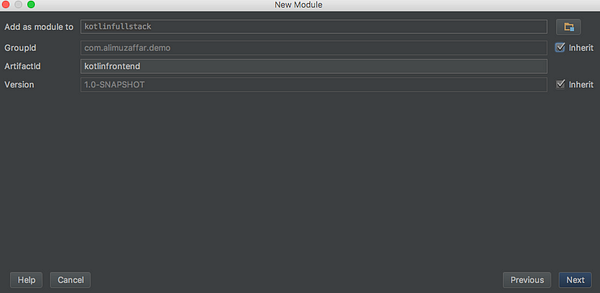
Your GroupId is basically the package name you want to give the project. Your ArtifactId is like the project name.
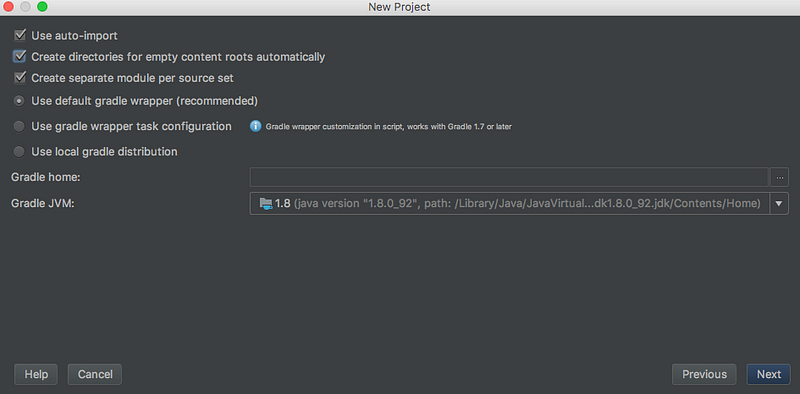
I like to check “Use auto-import” and “Create directories for empty content roots automatically”. This is a stylistic choice, you can leave the default options in and continue if you like.
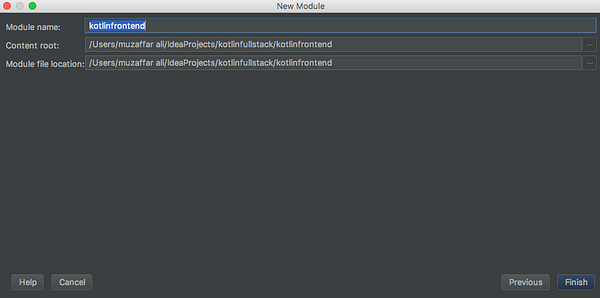
Select the actual project name and the path.
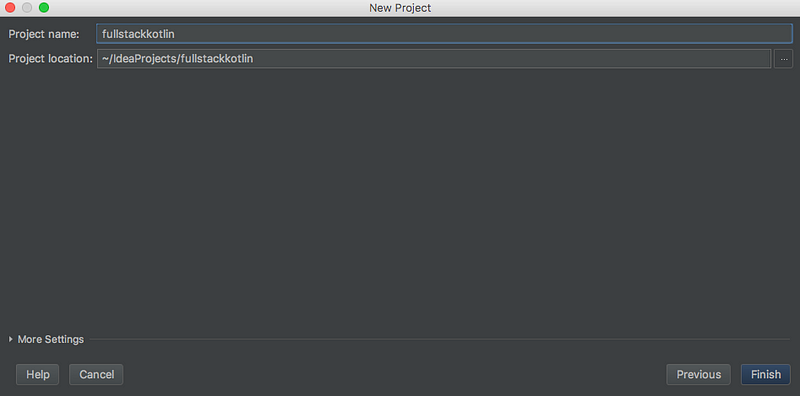
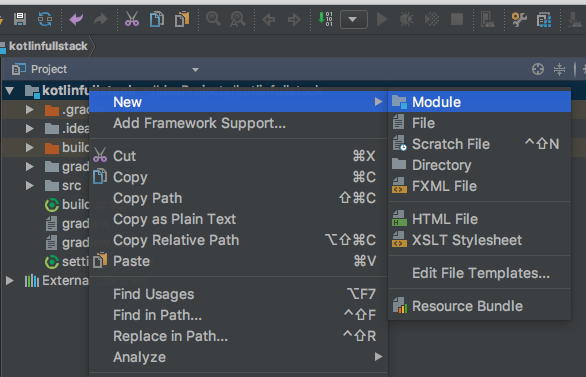
When you click finish, you’ll see a project as shown below. Now, we are now going to add a back-end and a front-end module.
Right click on the project name and add a new module as shown.
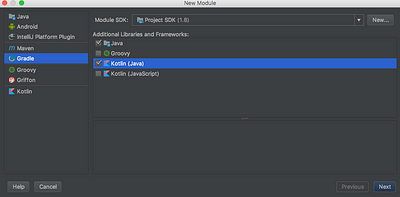
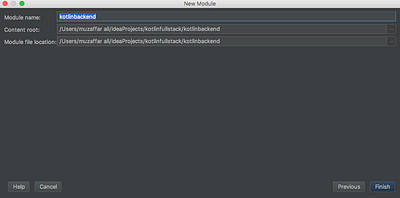
First, we will setup the backend module. The setup is very similar to the process we went through for the full-stack project. You can select Java and Kotlin in the frameworks and libraries you want to support, or just Kotlin if you like.
You can right click and open the images in a new tab, I’ve put all 3 inline to save space.
You should now see the front-end module in your project structure. Right click on the project name again and add an other module for the front-end. This time, we want to add Kotlin (JavaScript) support and not “Java” support.
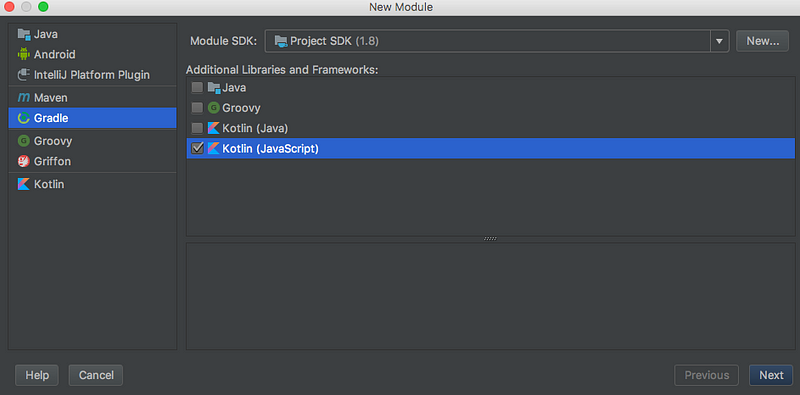
The rest of the setup is fairly similar to the above.
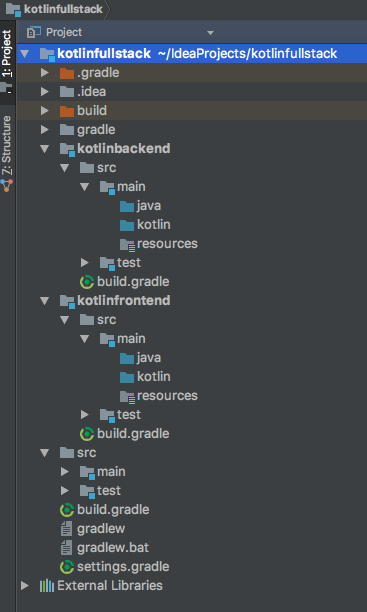
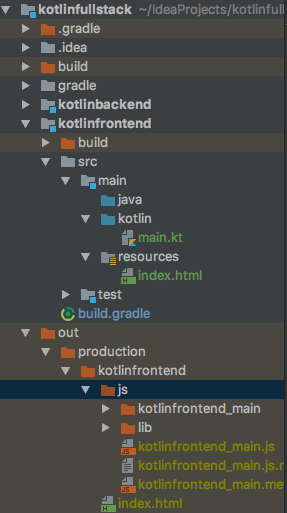
At the end of this process, you should have a project with a structure as shown.
Setting up our micro-service style API
We’ll setup a Kotlin file which will contain our micro-service. If you look at the readme for ktor you’ll see an example provided of how to do this. The screenshot below shows a message you will get when you first modify your build.gradle file. I would normally just accept this suggestion.

We are going to add a dependency on ktor and Gson for our project. I’ve highlighted the changes that I have made to the backend modules build.gradle file.
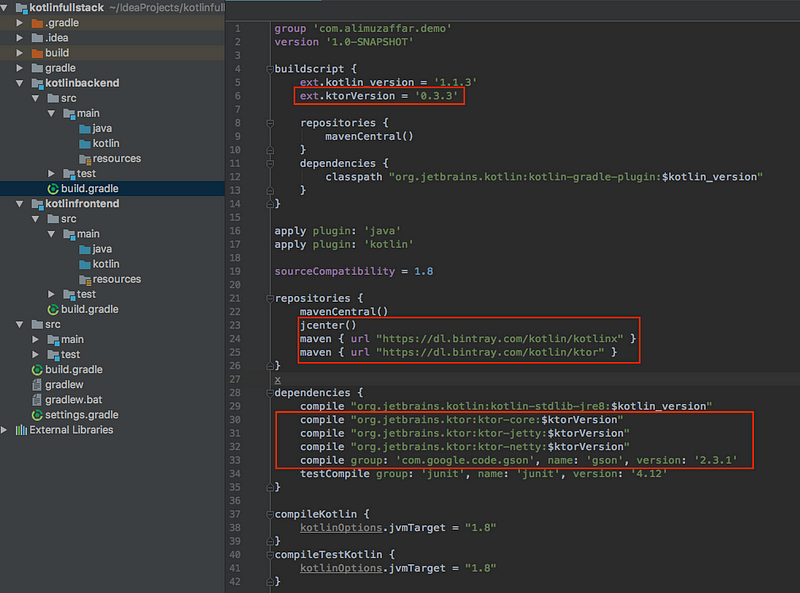
Note:
- If you need to copy paste, you can get the file from my github repo.
- I tried naming the ktorVersion as ktor_version and for some reason this doesn’t work. Don’t know why, I just accept it and moved on.
The code for my micro-service
We will have a simple micro-service which will will accept as a path parameter a number and return a JsonArray on that size.
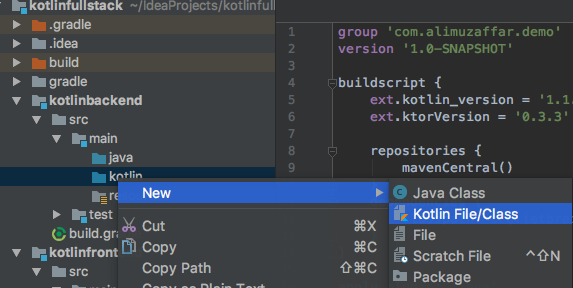
Right click on your backend modules src/main/kotlin directory and select to start a new kotlin file. What name you give it does not matter at this point. I called my file Main.kt.
The code for Main.kt is as follows:
//Main.ktimport com.google.gson.Gsonimport org.jetbrains.ktor.application.callimport org.jetbrains.ktor.host.embeddedServerimport org.jetbrains.ktor.http.ContentTypeimport org.jetbrains.ktor.netty.Nettyimport org.jetbrains.ktor.response.headerimport org.jetbrains.ktor.response.respondTextimport org.jetbrains.ktor.routing.getimport org.jetbrains.ktor.routing.routingfun main(args: Array<String>) {embeddedServer(Netty, 8080) {routing {get("/api/ping/{count?}") {var count: Int = Integer.valueOf(call.parameters["count"]?: "1")if (count < 1) {count = 1}var obj = Array<Entry>(count, {i -> Entry("$i: Hello, World!")})val gson = Gson()var str = gson.toJson(obj)call.response.header("Access-Control-Allow-Origin", "*")call.respondText(str, ContentType.Application.Json)}}}.start(wait = true)}data class Entry(val message: String)
When you run this server, the embeddedServer which is Netty, will run on port 8080 using Kotlin coroutines. It will listen for a GET on /api/ping and an optional count path parameter. It will then create an Array of Entry objects, the number of objects depends on the count passed in. Entry a data class which is shorthand for a Java Bean. Entry is defined at the bottom, it’s just a class with one “message” String in it). We use Gson to convert the Array to JSON and return it.
Note: The Access-Control-Allow-Origin header is required at this stage because on our local machine the front-end will run on a different http server and will have a different port, hence the browser will complain about cross domain attacks. To bypass this issue, we add the header.
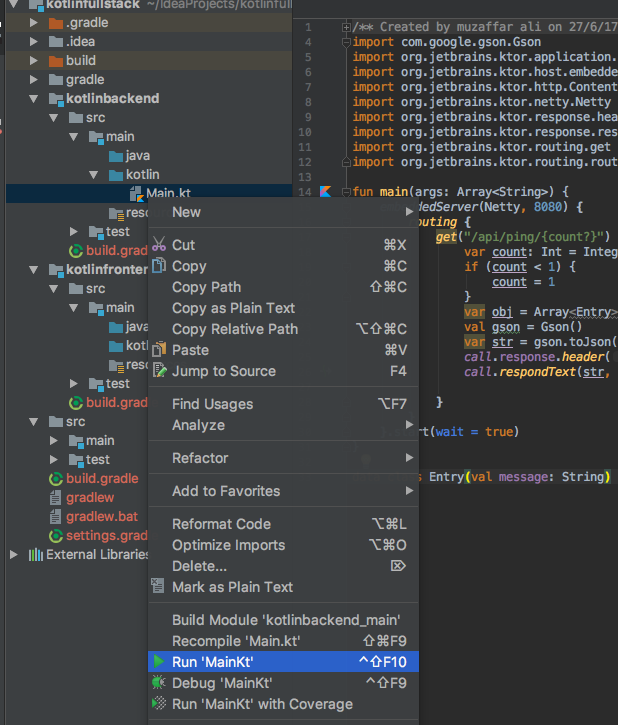
After copy pasting this code into Main.kt, you can right-click on Main.kt and select Run ‘Main.kt’.
If you now visit http://localhost:8080/api/ping you should see the result. You can add the optional path parameter if you like http://localhost:8080/api/ping/3.
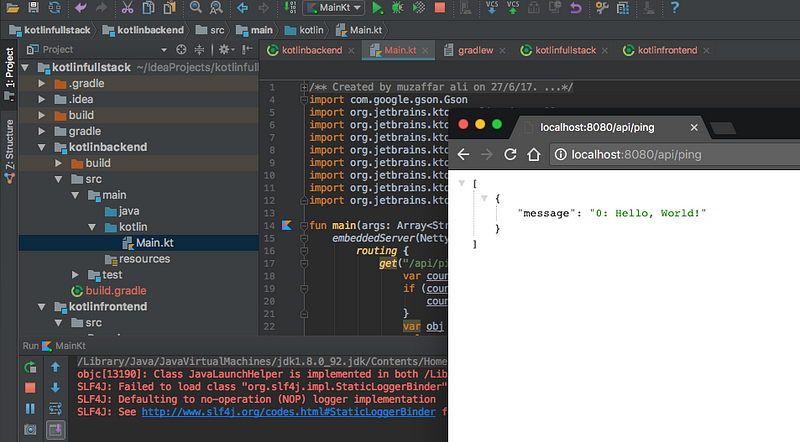
There you have it, you have a simple micro-service setup!
Setup the web-app
We have already created the front-end module.
We now have to configure our front-end build.gradle file to output the JavaScript files in the correct location and setup our webpage.
Setup the webpage
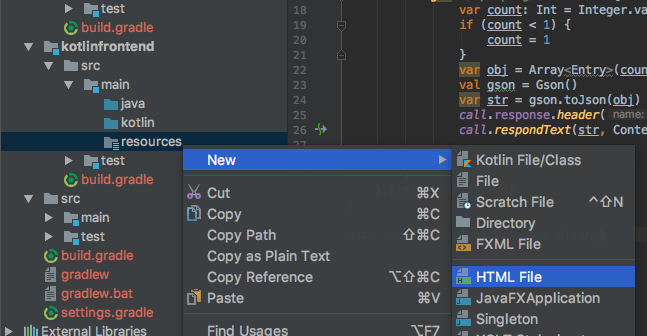
We first setup the webpage, because this will give us an idea of where IntelliJ builds the project. The HTML page will be create under the front-end > src > main > resources directory. Call it index.html. You can set it up however you like. you can see my code for index.html below.
<!DOCTYPE html> <!-- index.html --><html lang="en"><head><meta charset="UTF-8"><title>Console Output</title></head><body><div style="display:block"><label for="count_id">Enter number of elements to fetch:</label><input id="count_id" name="count" value="1"/></div><button id="button_id" type="button" style="display:block">Submit</button><textarea id="textarea_id" style="width: 100%; height: 200px"></textarea><script type="text/javascript" src="js/lib/kotlin.js"></script><script type="text/javascript" src="js/kotlinfrontend_main.js"></script></body></html>
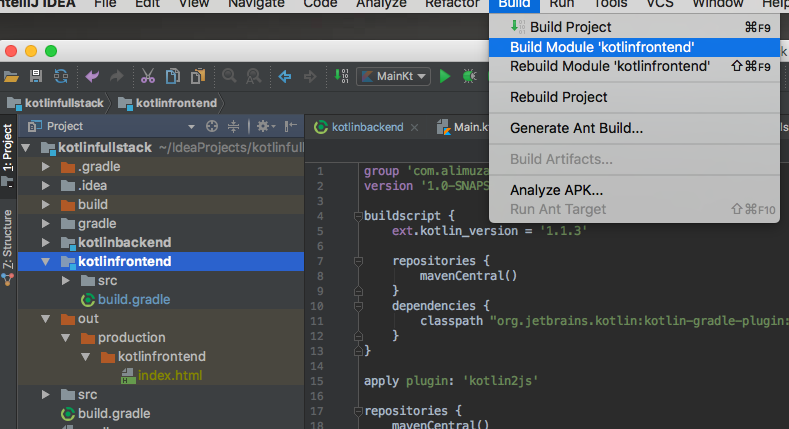
The reason it’s important to setup the webpage first is that we want to see what happens when you tell IntelliJ IDEA to build the front-end module. If you click on the front-end module go to Build > Build Module… you’ll see that IntelliJ outputs the resources director under the Project directory at the same level at the modules. It’s the red directory called out/. We want to output our JavaScript in the same directory, preferably at the path we’ve specified in the <script> tags above.
Configure your front-end build.gradle file
Now that you know where your resources end up when the project is built, this next step will make more sense, we want to configure Kotlin2JS to output our JavaScript in the same directory and we go this by configuring our front-end modules build.gradle file (look at the last 4 lines).
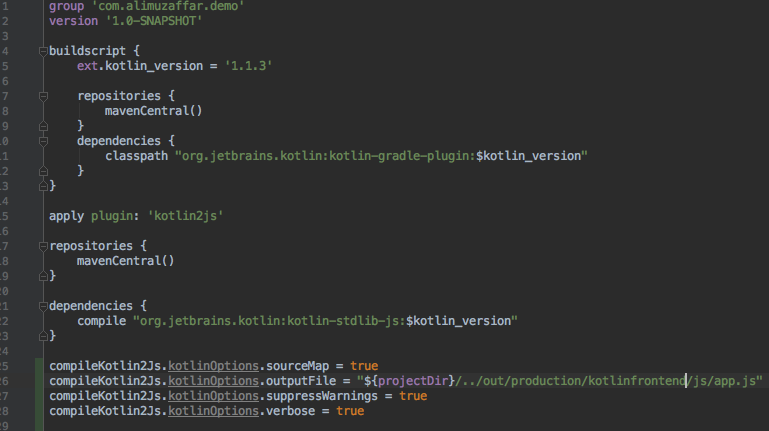
If you need to copy paste this, you can get the code from my GitHub repo.
Now, we need to write some Kotlin to generate JavaScript.
Writing Kotlin to generate JavaScript
I will admit that this part felt a little odd to me. For some reason, my mind can make the logical jump to using Kotlin as an alternative to Java using Java APIs and so, I some how expected to be able to use Java APIs for writing JavaScript. This turned out to not be the case at all. Instead, writing Kotlin for the browser felt very much like writing JavaScript, which had some sort of Java mashup.
Right-click on your front-end > src > main > kotlin directory and create a new Kotlin file called main.kt. Note that main.kt is all lowercase, that’s how you know it’s a JavaScript file and not a Java class file. You can give it a different name, I realise this may be confusing for a lot of people. If you do give it a different name, you’ll have to modify the script tags in your HTML, more on this later.
We are now going to write some code, to take a number from the webpage and use that to call our API and write the output to the webpage. This will require us to bind DOM elements, listen for events and even make an async AJAX call to our own API.
I like to think the code below is self-explanatory. But I’ll try to explain some of it. The main challenge I had in writing this was that I felt the API was not very well documented and of course, there was a lack of example. Hence this article.
import org.w3c.dom.Elementimport org.w3c.dom.HTMLInputElementimport org.w3c.dom.HTMLTextAreaElementimport org.w3c.dom.events.Eventimport org.w3c.dom.getimport org.w3c.xhr.XMLHttpRequestimport kotlin.browser.documentimport kotlin.browser.windowimport kotlin.js.Jsonfun main(args: Array<String>) {window.onload = {fetch("1")//Example of how to add stylesheets dynamically//add stylesheet if we have anyval head = document.getElementsByTagName("head")head[0]?.appendChild(createStylesheetLink("style.css"))//bind elementsval input = document.getElementById("count_id") as HTMLInputElementval button = document.getElementById("button_id")//bind click listener on buttonbutton?.addEventListener("click", fun(event: Event) {fetch(input.value)})}}fun fetch(count: String): Unit {val url = "http://localhost:8080/api/ping/$count"val req = XMLHttpRequest()req.onloadend = fun(event: Event){val text = req.responseTextprintln(text)val objArray = JSON.parse<Array<Json>>(text)val textarea = document.getElementById("textarea_id") as HTMLTextAreaElementtextarea.value = ""objArray.forEach {val message = it["message"]textarea.value += "$message\n"}}req.open("GET", url, true)req.send()}fun createStylesheetLink(filePath: String): Element {val style = document.createElement("link")style.setAttribute("rel", "stylesheet")style.setAttribute("href", filePath)return style}external fun alert(message: Any?): Unit
Take a look at this line:
val objArray = JSON.parse<Array<Json>>(text)
Whats the difference between JSON and Json? JSON is a concrete class that has methods to manipulate JSON objects and strings. Json is an external interface meaning that we are telling Kotlin that this is an JavaScript Json object. This may be a bad explanation.
What happens when you built your front-end project now? In the <project dir>/out/production/kotlinfrontend/ you should see the project structure that we expect.
You can see that the JavaScript file name is kotlinfrontend_main.js. This is because my front-end module was called kotlinfrontend and my kotlin file was called main.kt. If you give your kotlin javascript file a different name, you should update the <script> tag in your HTML file.
Running the project as a whole
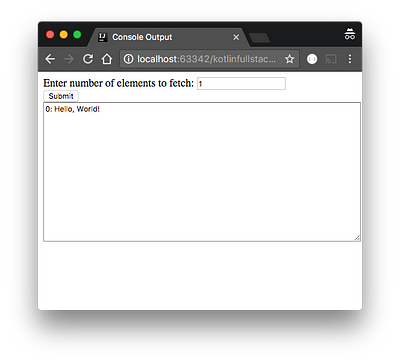
We have our APIs setup and we know how to run them. Run your API’s by right clicking on backend/…/Main.kt and selecting `Run ‘MainKt’`. Then, right-click on the index.html file in the out directory and open it in a browser. If all has gone according to plan you should see the page load and “0: Hello, world!” output to the TextArea.
You can now try changing the value in the Input area to see if you project works.

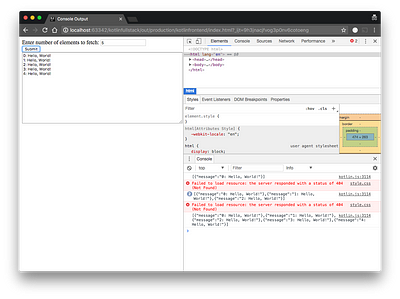
You will notice that style.css is missing. This is obviously because we never create it in our project structure. I just wanted to include an example of how you would dynamically create an element or add a stylesheet if you wanted.
There is also Aza-Kotlin-CSS which makes it so that you can handle all your CSS in Kotlin as well and don’t even have to bother with annoying actual CSS.
If you should writing the HTML was a drag… well, there are limitation, but you can still handling building a lot of your DOM in Kotlin using the Kotlinx.html library it makes manipulating the DOM simple. Just look at this example:
System.out.appendHTML().html {body {div {a("http://kotlinlang.org") {target = ATarget.blank+"Main site"}}}}
Or this one:
window.setInterval({val myDiv = document.create.div("panel") {p {+"Here is "a("http://kotlinlang.org") { +"official Kotlin site" }}}document.getElementById("container")!!.appendChild(myDiv)document.getElementById("container")!!.append {div {+"added it"}}}, 1000L)
Checkout Kotlins working with JavaScript documentation for more and for information on how to use jQuery with it. I’m sure a lot of people will want to do that.
Update: Notes on using Gradle to build
So this code mysteriously stopped working the next day and the output directory for the resources changed from the “out” directory to the “build” directory. Not sure what happened there. However, there is an other issue that we face when building with Gradle.
In my kotlinfrontend/build.gradle you may have noticed a line:
compileKotlin2Js.kotlinOptions.outputFile = "${projectDir}/../out/production/kotlinfrontend/js/app.js"
It may have struck you as odd that
app.js was not out as part of our build process. Instead, we had something like kotlinfrontend_main.js. Well, that’s because we were building 1 JS file. If you use gradle, it will put all your JavaScript in one JS file whose name you supply above. Also, you’ll notice that /js/lib/kotlin.js will be missing because this file is bundled in a jar as part of the build process. The fix for this is simple:- Copy the static resources to a directory of your choice in your gradle build.
- Unzip the jar and extract the js files we want.
I decided to simplify the process by coping all front-end projects files to a web directory. The changes to my
build.gradle file are below. The only way this affects the code in this project is that you have to make a slight change in your index.html to point to app.js instead of kotlinfrontend_main.js and your web directory will be <front-end module>/web/ instead of <project root>/out/compileKotlin2Js.kotlinOptions.sourceMap = truecompileKotlin2Js.kotlinOptions.outputFile = "${projectDir}/web/js/app.js"compileKotlin2Js.kotlinOptions.suppressWarnings = truecompileKotlin2Js.kotlinOptions.verbose = truebuild.doLast {//Copy kotlin library files to the web directory// Copy kotlin.js and kotlin-meta.js from jar into web directoryconfigurations.compile.each { File file ->copy {includeEmptyDirs = falsefrom zipTree(file.absolutePath)into "${projectDir}/web/js/lib"include { fileTreeElement ->def path = fileTreeElement.pathpath.endsWith(".js") && (path.startsWith("META-INF/resources/") || !path.startsWith("META-INF/"))}}}
//Copy static resources to the web directorycopy {includeEmptyDirs = falsefrom "${buildDir}/resources/main"into "${projectDir}/web"}}//Delete the web director as part of the clean commandclean.doFirst {delete "${projectDir}/web"}
The other benefit of this process now is that if you don’t want to execute builds from the command line every time your make a change to your files, you can use gradle continuous builds to watch the files for you and run build when the files change. From the command line, simply run:
./gradlew -t build
Now, every time you make a change to a Kotlin JS file or a static HTML, CSS file, you should just be able to refresh your browser.
Final thoughts
What I have above is the result of a lot of effort. I really don’t understand why people think using one language over the other is “fun” but this exercise for me was decidedly not “fun” it was extremely frustrating where I constantly had to struggle with a lack of examples on how to even make a simple AJAX call without using jQuery. Most example of using Kotlin for JavaScript were simple examples that made no AJAX calls and did not JSON parsing and figuring all of that out, especially when to use JSON or Json was extremely frustrating. Also, there was constant confusing between what was native to Kotlin, such as Array, what was native to JavaScript and what was native to Java. In Kotlin (JavaScript) the example below shows what I mean, the first works, the second doesn’t.
//WorksJSON.parse<Array<Json>>(text)
//BrokenJSON.parse<ArrayList<Json>>(text)
This is likely because of my lack of knowledge of Kotlin. I do know that Array is basically like a Java primitive array but you can see how you can end up using List, or ArrayList there and just be frustrated as to why it doesn’t work.
An other example:
//Works as expected, has all element propertiesdocument.getElementById("count_id") as HTMLInputElement//Does not work at alldocument.getElementById("count_id")
Just casting here made all the difference, the issue for me here was that I had to discover the API, I wasn’t able to Google up just what I should be doing there, and just figuring out that I needed to be able to cast the element to it’s exact type to be able to get any sort of useful functionality out of it was frustrating. Without it, there was very little functionality available. Yes, maybe kotlinx.html would have helped here.


No comments:
Post a Comment